
Riding a Moto Morini marks you out as an individual in a way that only an Italian motorcycle can. Launched in 1973, a year ahead of its better known Sport sibling, the Moto Morini 3½ Strada remained in production until 1983.
This particular model dates from 1981 and would have cost around £1,500 when new. For context, at that time, four-stroke twins with a touring bias from the big-four Japanese manufacturers such as the Honda CB400N Super Dream, the Kawasaki Z440C, the Suzuki GSX400E and the Yamaha XS400S all cost between £1,000 and £1,100 but these were all much weightier machines and the sweet-handling lightweight Italian made it worth the extra for those lucky enough to be able to afford it.
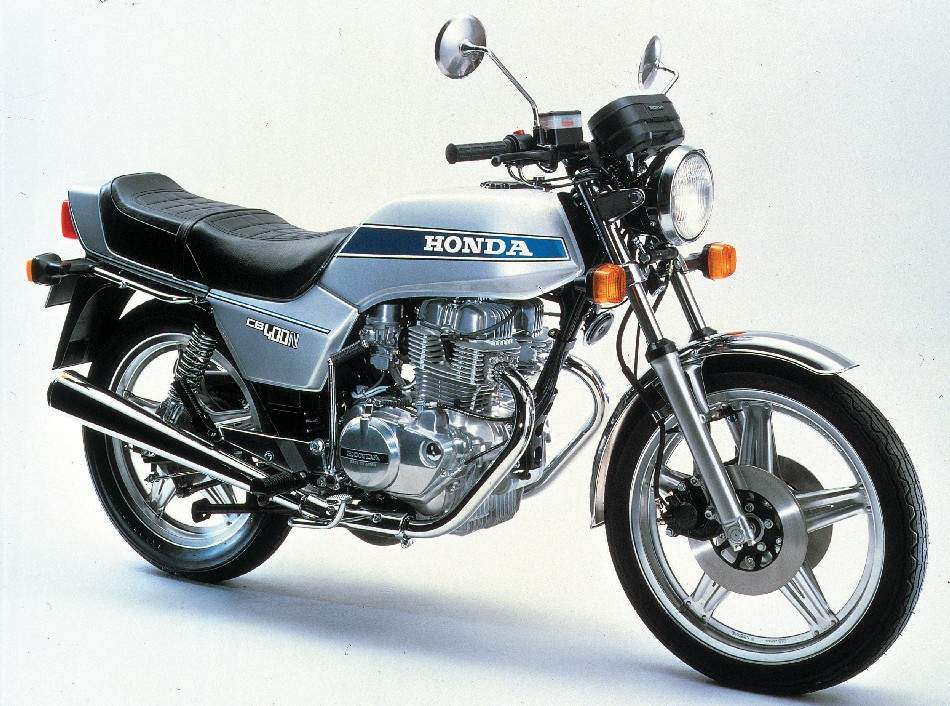
Honda CB400N Superdream

Kawasaki Z440C

Suzuki GSX400E

Yamaha XS400S
Moto Morini 3½ Strada Specifications
| Model | Strada (also known as Standard, GT, Touring, T, V and VT) |
| Production | 1973 - 1983 |
| Engine | 344cc, 72-degree V-twin, air-cooled, four stroke |
| Gearbox | 6-speed |
| Suspension | Front: telescopic forks Rear: twin shocks |
| Wheels | Front and rear: 18-inch, seven spoke alloys |
| Brakes | Front: 260mm disc Rear: 200mm drum |
| Wheelbase | 1,390mm |
| Weight (dry) | 144kg |
| Fuel capacity | 14 litres |
The road to restoration
The bike featured here is the pride and joy of one Norma Hull who caught the Moto Morini bug at a bike show in the mid ’70s when she clapped eyes on a Strada for the first time. Norma finally took the plunge some twelve or so years later and bought one…this one. For few years, it served as Norma’s daily ride but the throttle-action on the two Dell’Orto carburettors grew increasingly heavy and, eventually, it was put into storage and another bike used for the commute. Several years later, her son Adrian, flushed with the success of his first full restoration project (as featured on OilySmudges), decided that the time had come to breathe new life into the little twin and get it show-ready with a nut and bolt rebuild.
Overall, this restoration took Adrian about three months and, considering the amount of work involved, we think the result is pretty impressive.
Engine
Some cosmetic work was carried out on the engine in the early ’90s: casings were stripped, blasted and stove-enamelled with an aerospace-grade product which is resistant to oil and fuel; and, barrels and heads were glass bead-blasted to give a lovely bare alloy appearance. Such was the quality of the work done, that over twenty years later, once the engine was removed from the frame, only a moderate amount of cleaning was required to revive its appearance.

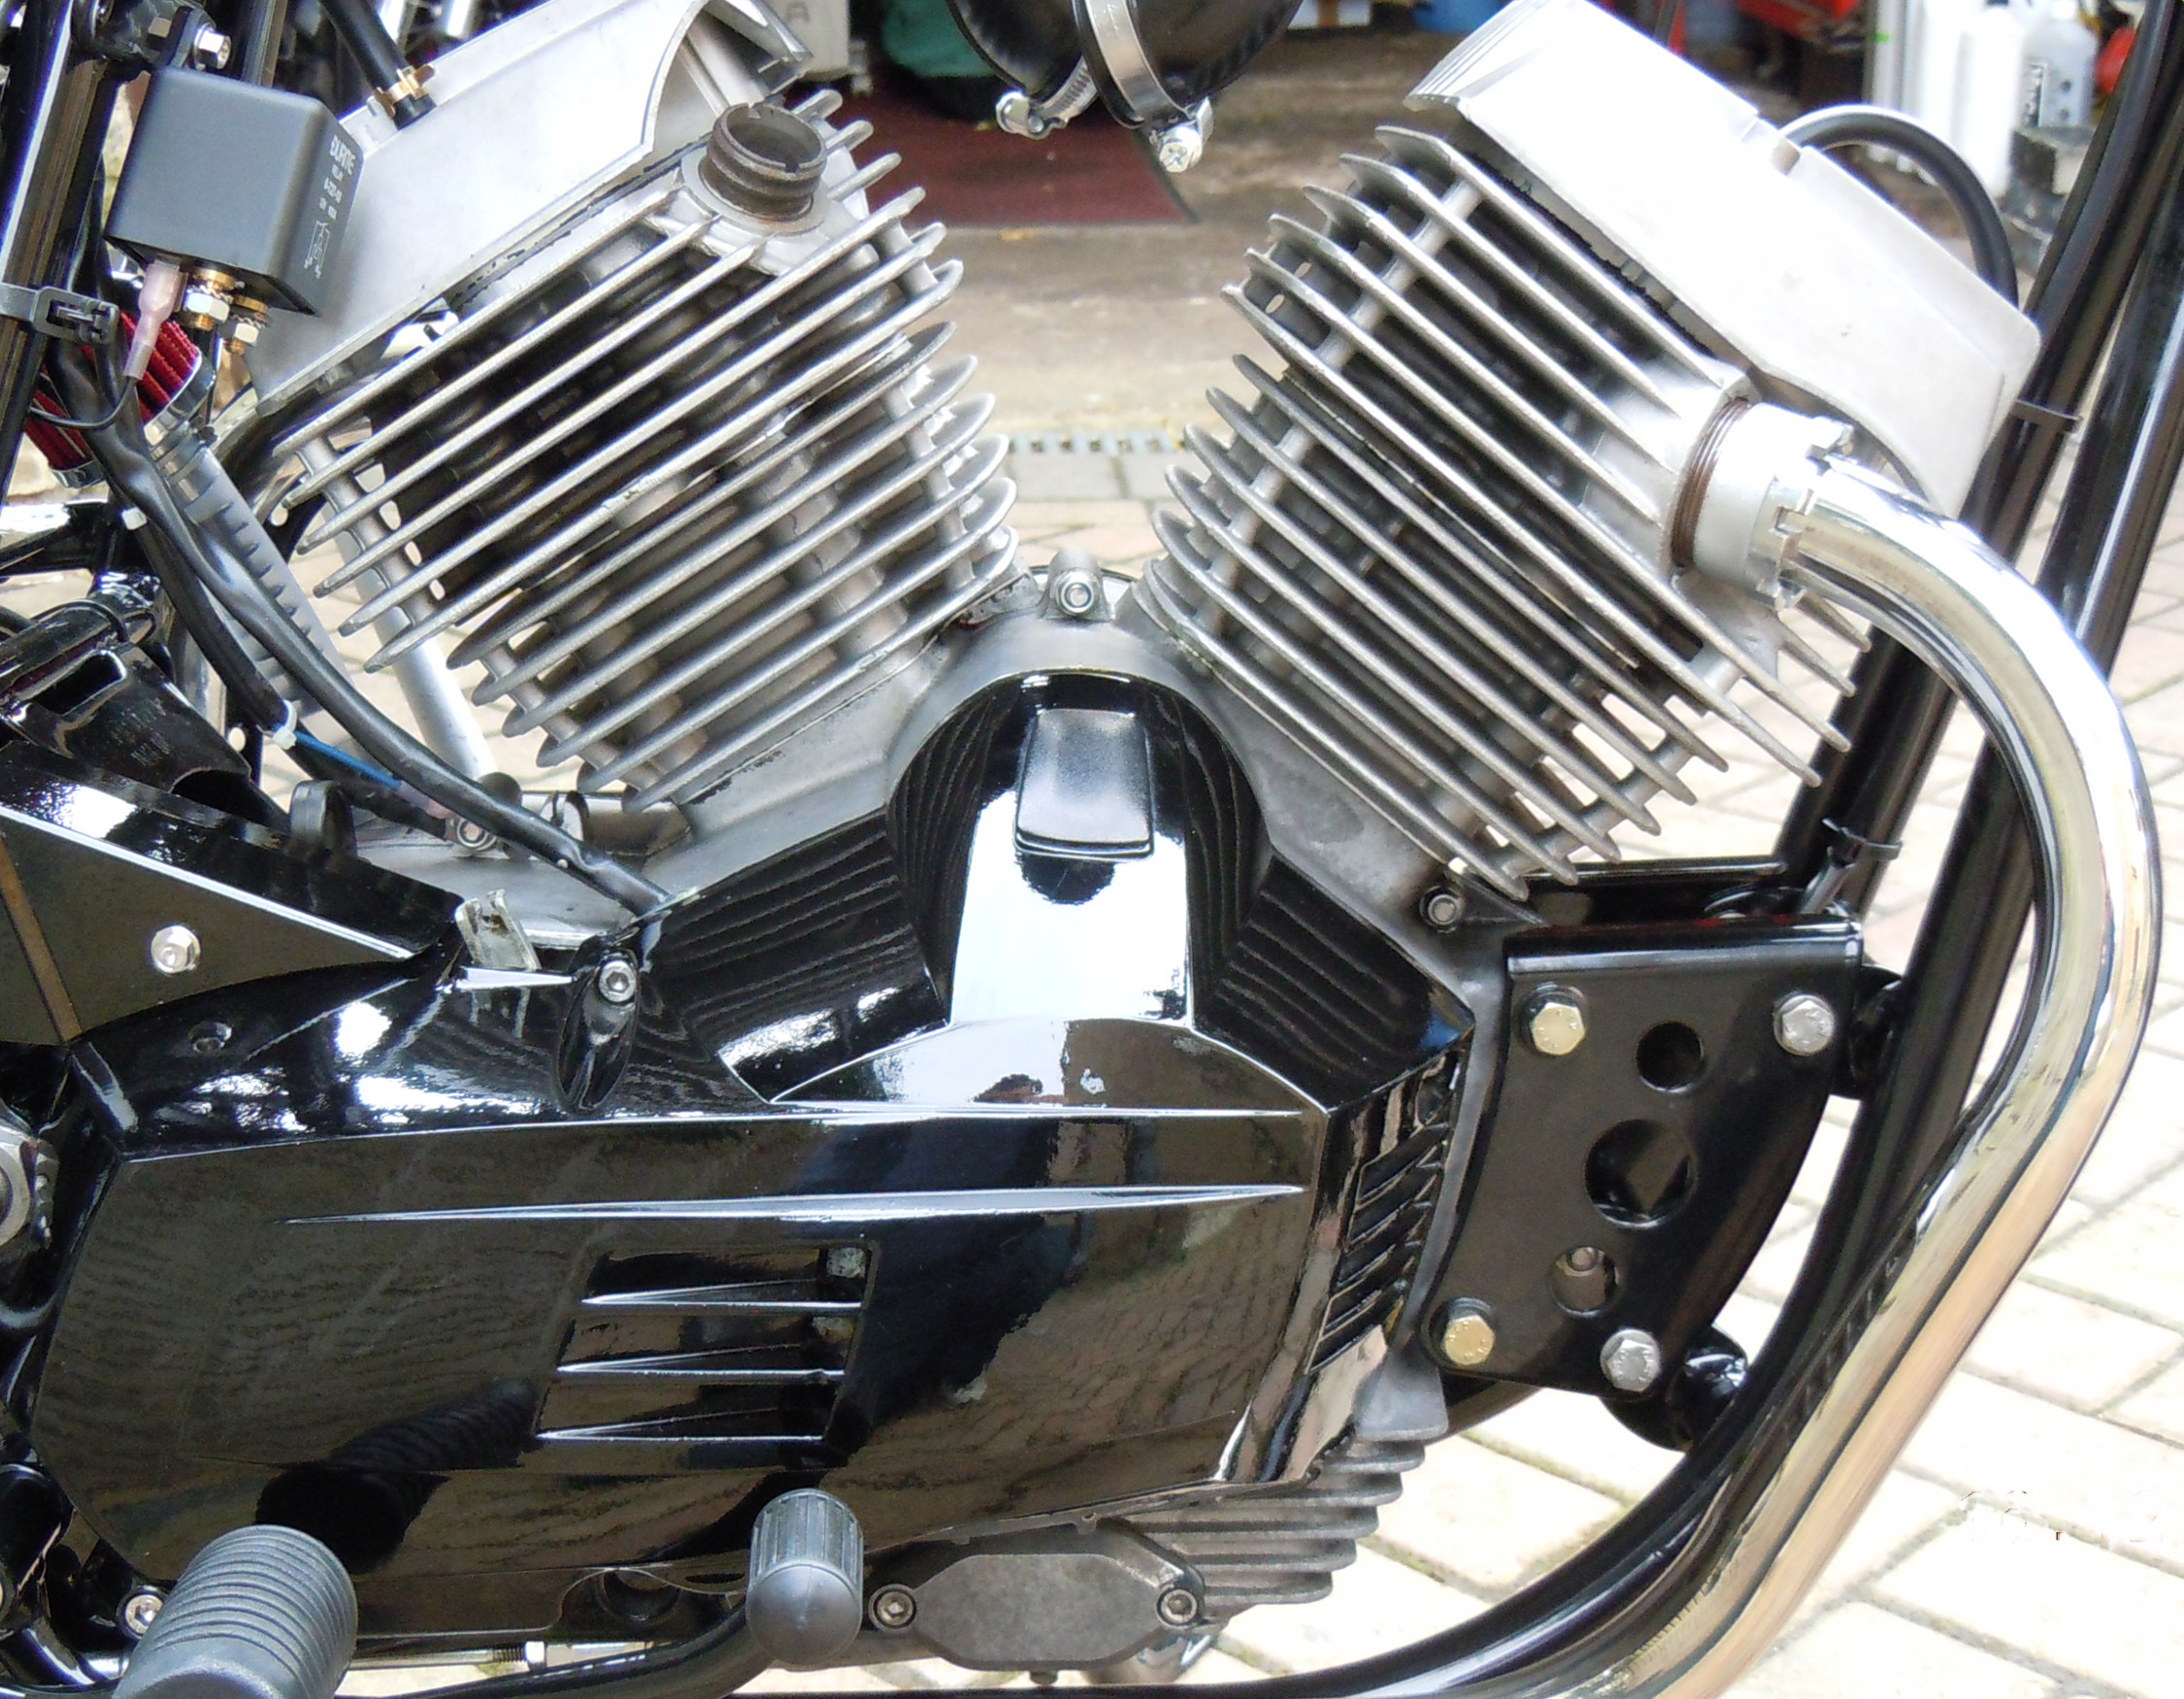
Engine – cleaned up
This time around: the starter motor assembly was removed, cleaned and serviced; the gearbox seals were checked; and, the oil in the ‘box was changed.
Whilst sorting out the timing, Adrian compared the positions of the TDC (top dead centre) marks against actual TDC using a digital test indicator (DTI) and found that they were approximately 1.5 degrees retarded at true TDC!
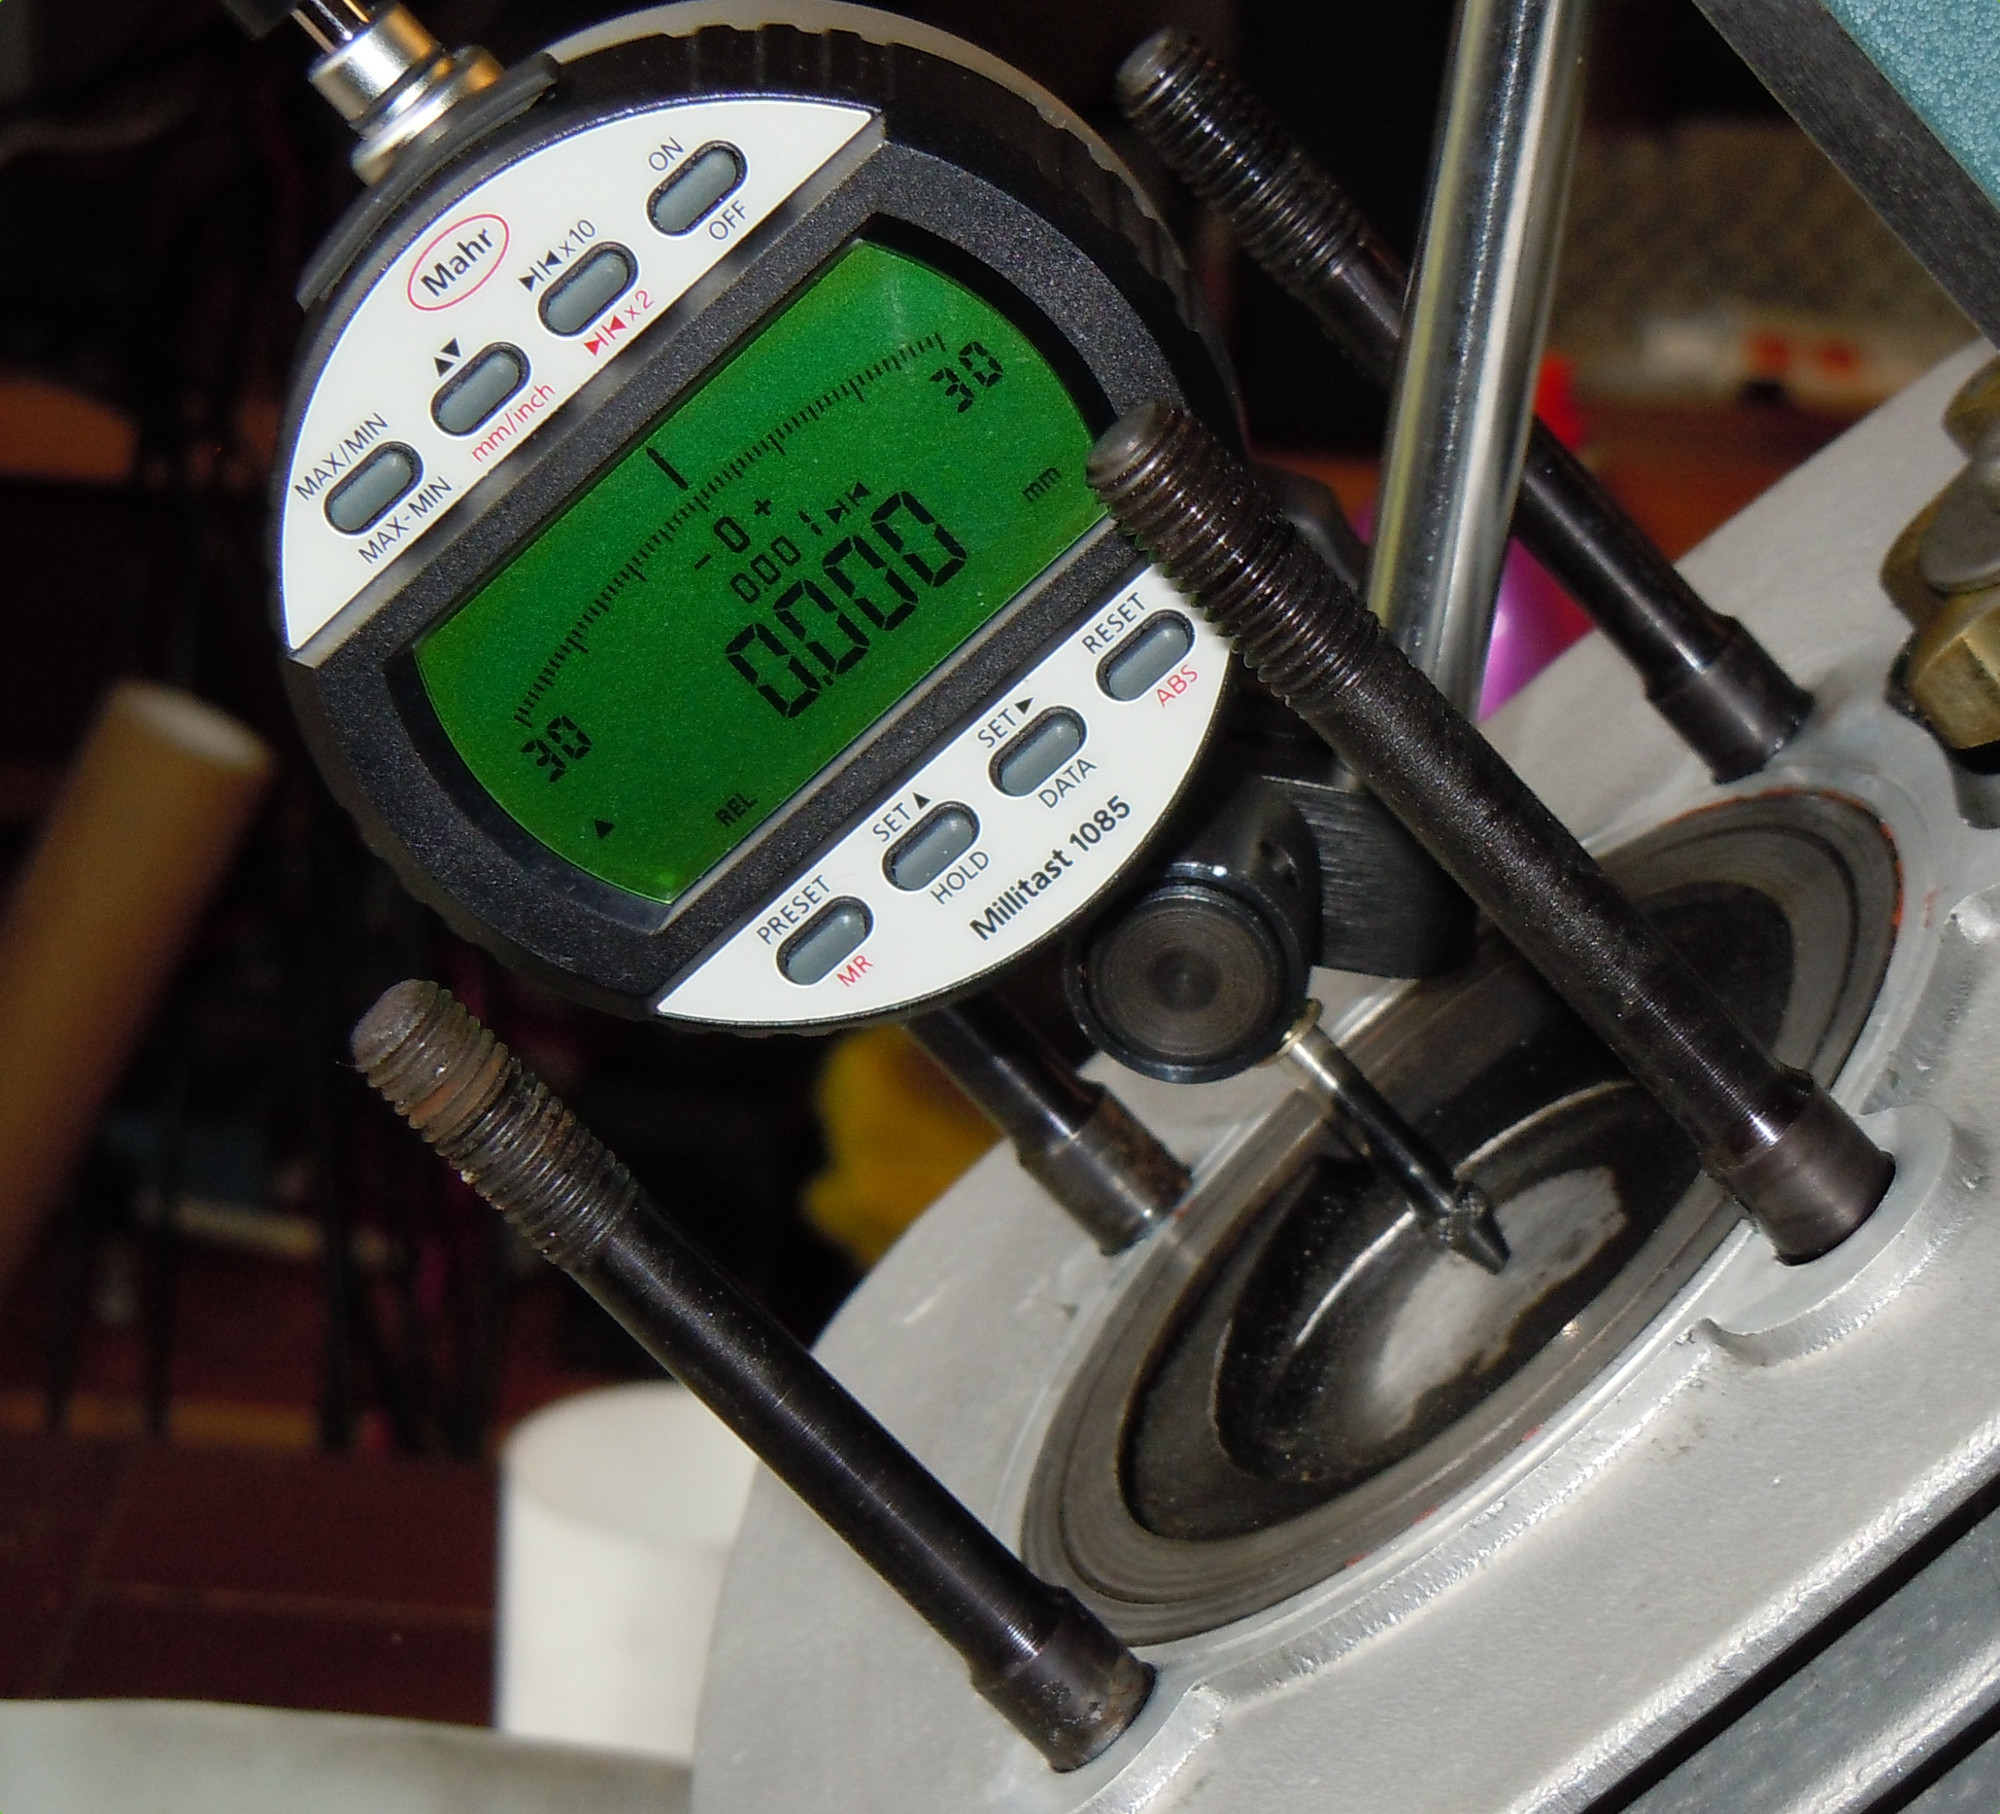
Marked TDC was 1.5 degrees out from true
One aspect of buying and running an older bike that should never be forgotten is the vast potential for one or more previous owners to have done something completely unexpected whilst working on it. Often, this will manifest in the form of jury-rigged electrics but, on this occasion, it was the mixing of valve retention components from early and late versions (MK1 and MK2). Adrian upgraded all of the parts in both heads to MK2 specification and lightly lapped the valves with stainless steel polish to clean the valve seats and did a quick blue check (painting the valve seat with a blue dye, then repeating the lapping technique and checking for an even coating of the dye on the valve face). Check out Cyclepedia for a more comprehensive explanation.

Blue checking the valve for an even seal
After a ride, this bike smelt of hot oil rather like a garage workshop, but Adrian fixed this by adding a small oil catch can and a K&N vent filter.
Typical of the finish Adrian achieves with his projects, a new stainless steel exhaust system was finely polished to remove any scratches it arrived with.

Finely polished stainless steel exhausts
Fuel supply
On the induction side, the carburettors were stripped, cleaned and rebuilt using genuine Dell’Orto gasket sets from Eurocarb. Eurocarb have been the official importers for Dell’Orto since 2000 but the guy who runs it, Matt Cooper, has thirty years’ experience with the brand. They were particularly helpful when it came to re-jetting the carburettors for today’s fuels. Finally, new genuine air filters were fitted to the standard airbox.
Adrian has modified the fuel supply system, including fuel filters, to deliver an equal fuel feed to each carburettor by splitting the fuel supply from the tap using a ‘Y’ piece instead of a single feed delivering to the front carburettor first and the excess feeding the rear carburettor. This arrangement was done for both fuel taps which are now manual versions in place of the original electromagnetic items.
Chassis, suspension, bodywork & brakes
Not surprisingly, after 35 years, the frame and all the brackets were sorely in need of some refreshment so they were packed off to Goldburn Finishers in Borden, Hampshire to be stripped and powder-coated in black.
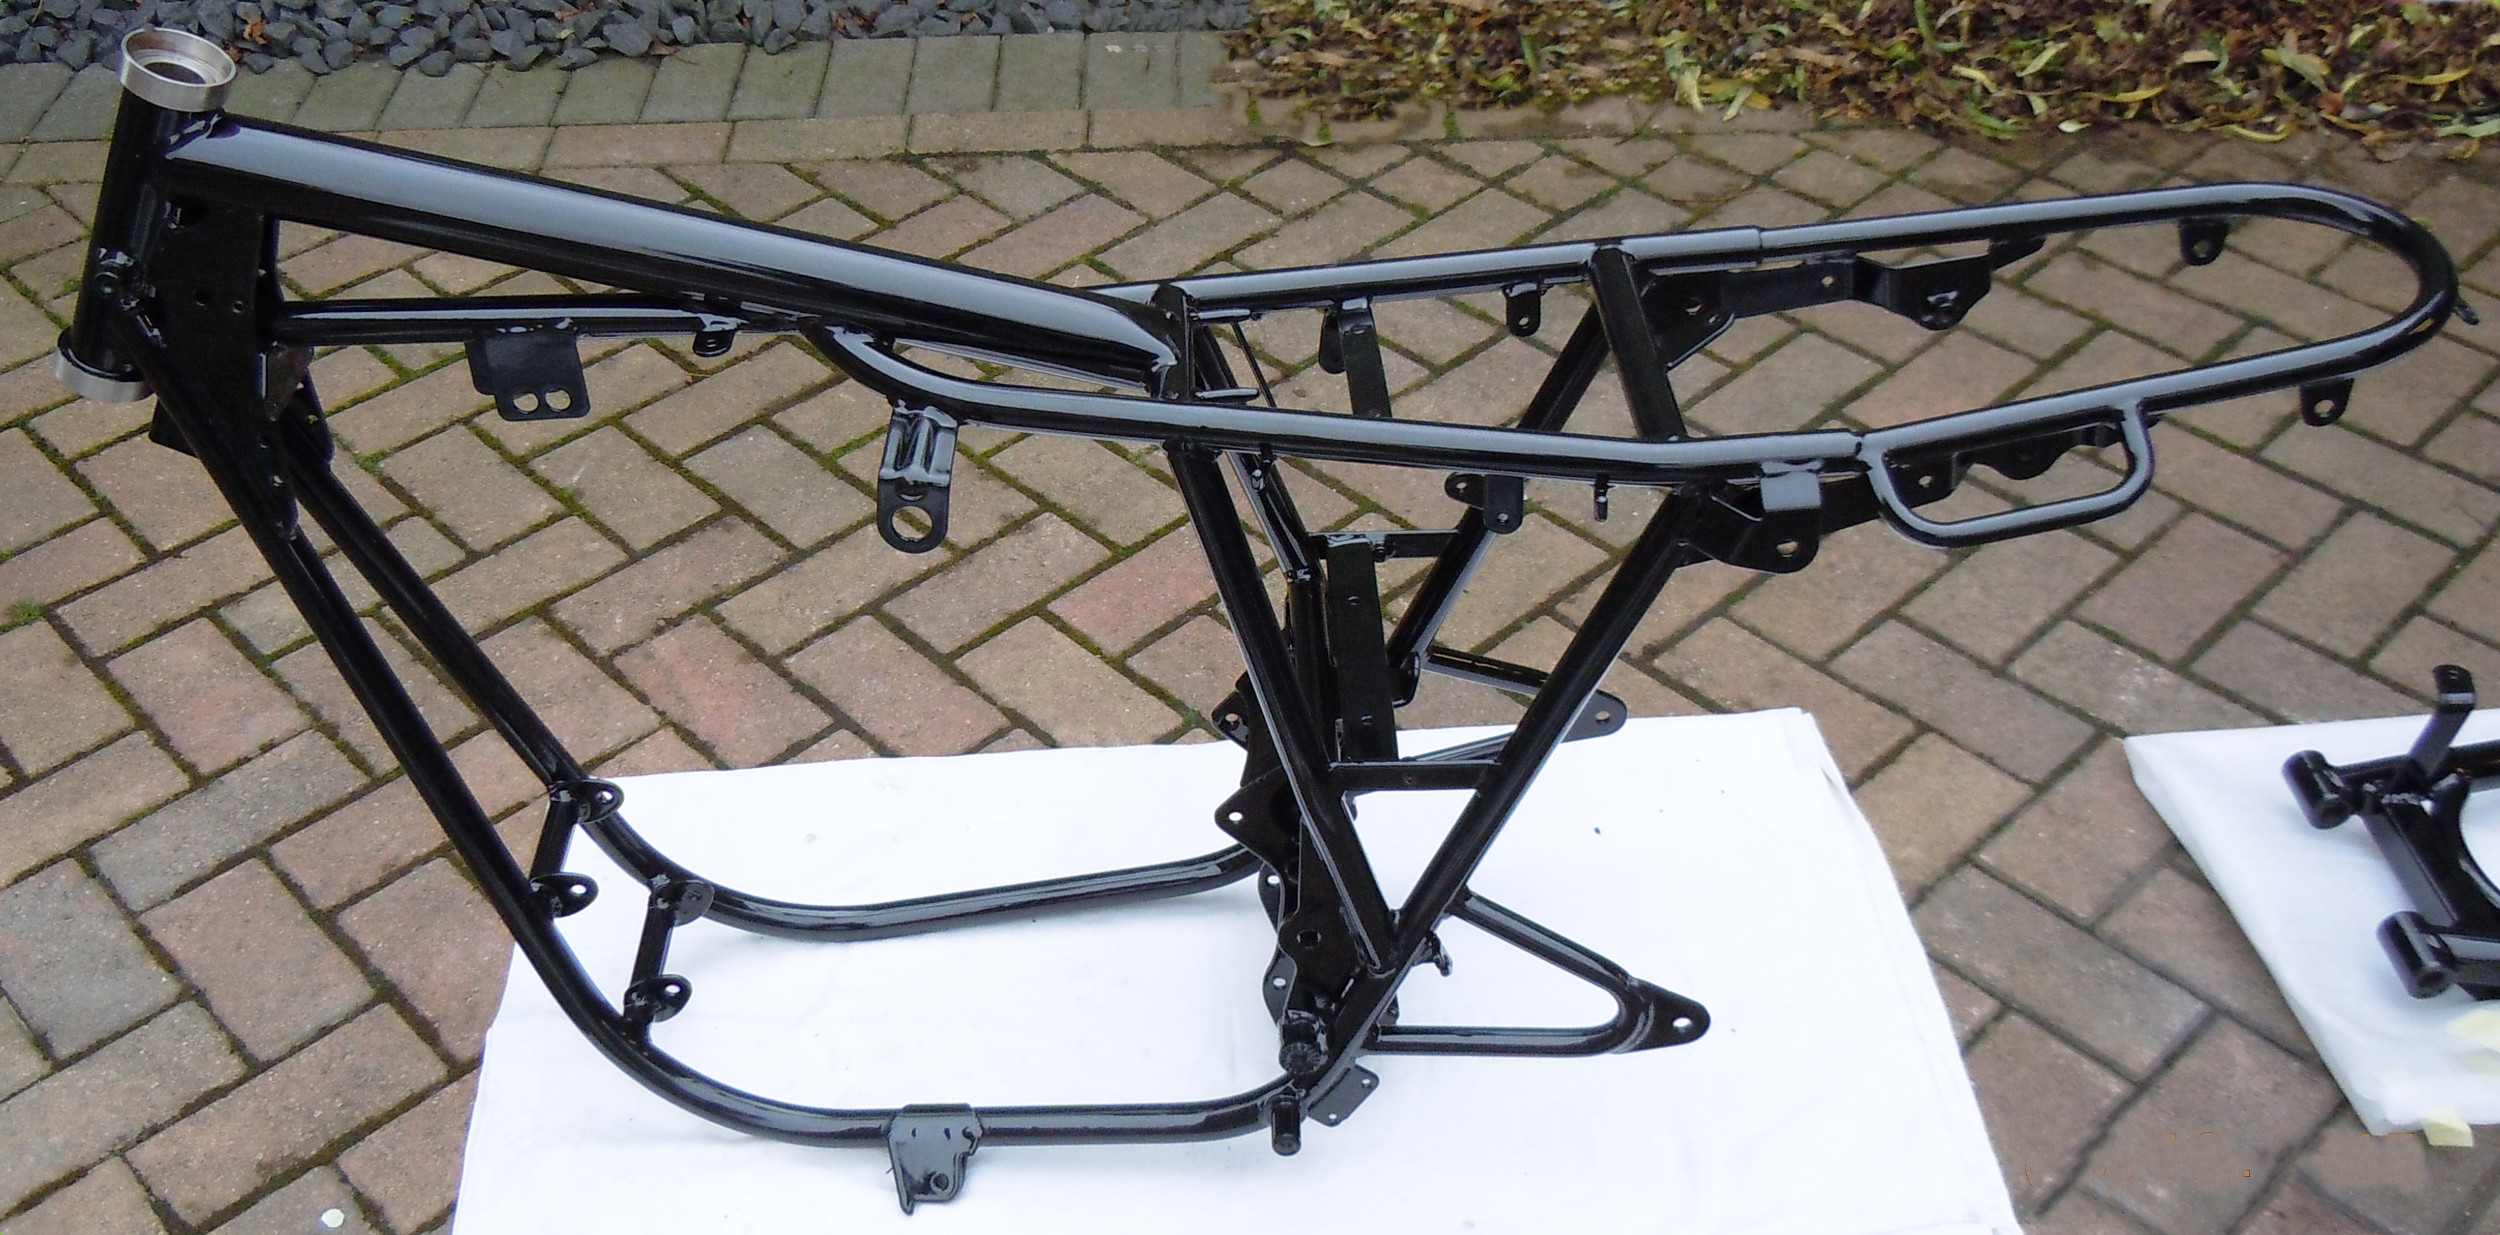
Frame – stripped and powder-coated
Meanwhile, alloy components such as the wheel hubs and the rear sprocket carrier were glass bead-blasted and then lacquered to preserve the finish. The wheels themselves were powder-coated in Mercury Silver and then lacquered with a satin finish (again, by Goldburn). There is some doubt as to the originality of the resulting flat appearance with some saying that no Moto Morini left the factory with that finish while others say there were a limited few. If you know more about this, we’d love to hear from you.
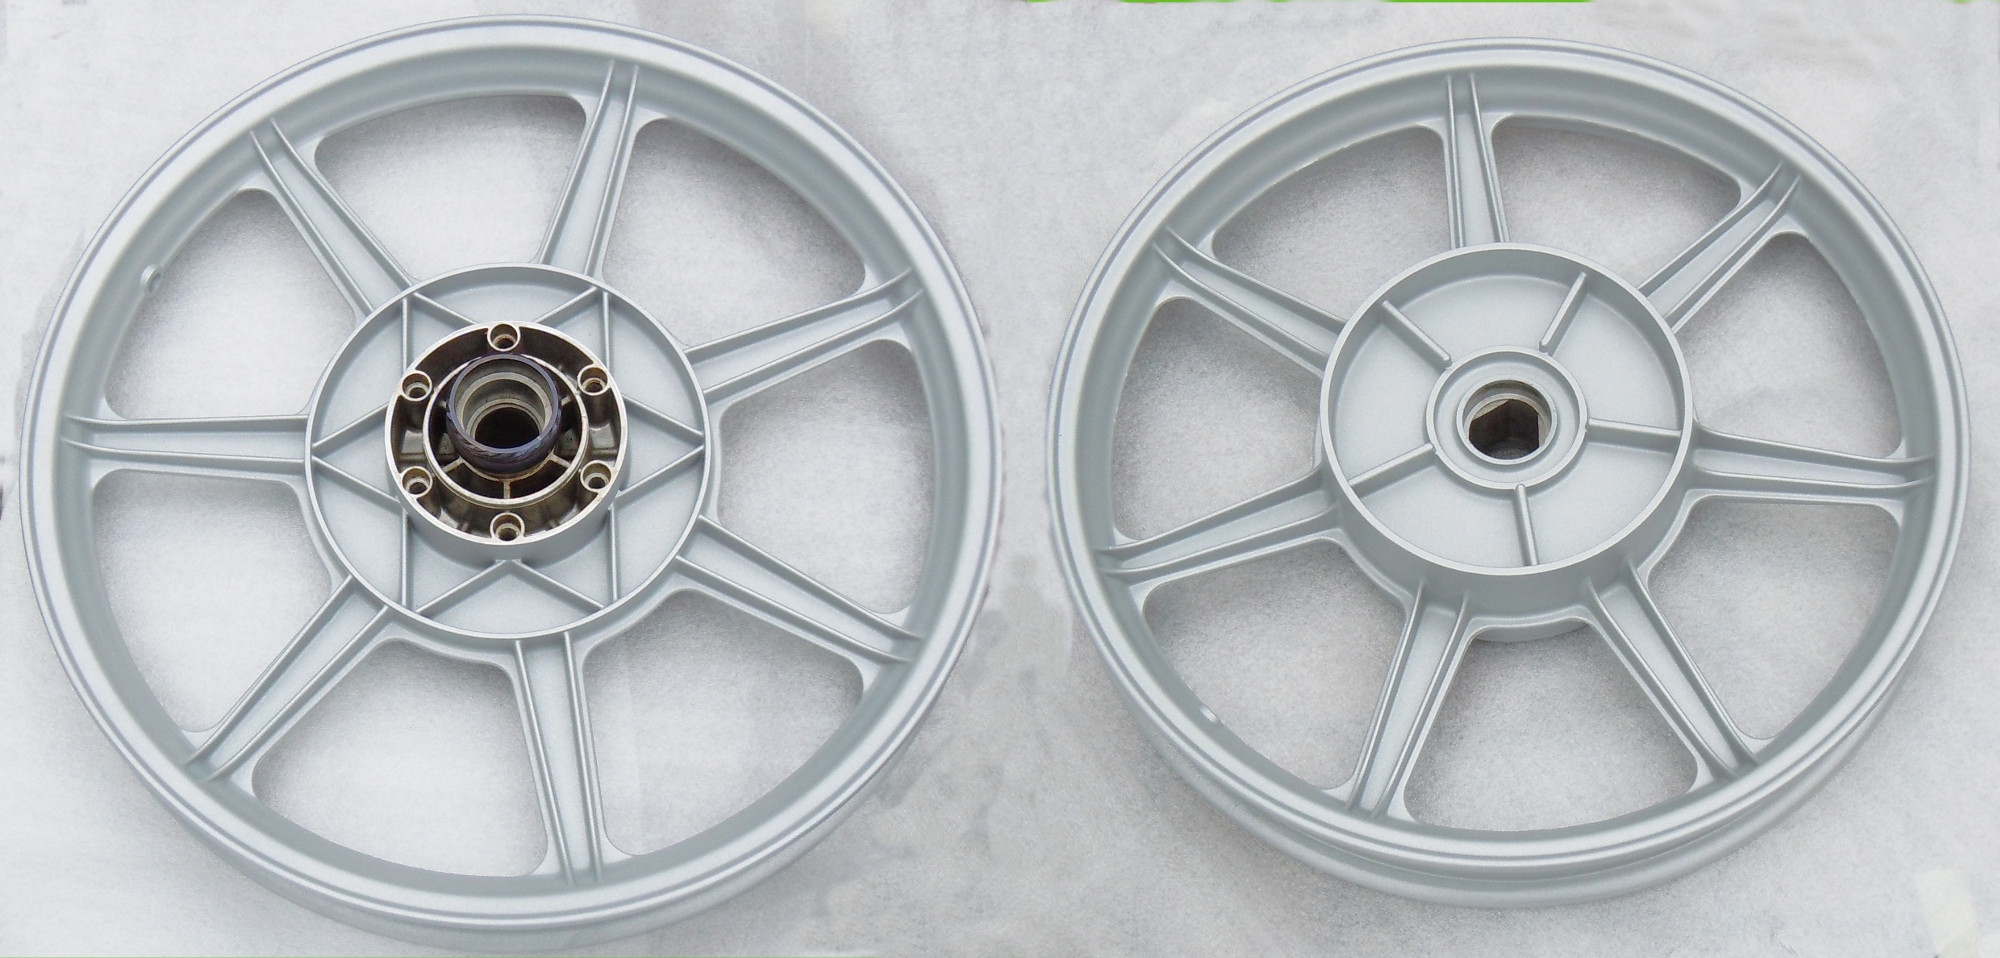
Wheels – Mercury Silver with a satin finish
Suspension-wise, Adrian replaced the original Marzocchi rear shocks with new ones from Hagon whilst the front forks were stripped down and rebuilt using new seals from Italian classic motorcycle specialist North Leicester Motorcycles and Silkolene 10W Fork Oil. The outer sliders were cleaned up and sprayed with Tetrosyl Satin Black (as were the top and bottom yokes) whilst the stanchions, being badly pitted, were sent off to AM Philpot to be re-chromed.
Naturally, the brakes were thoroughly overhauled with worn components replaced as required.
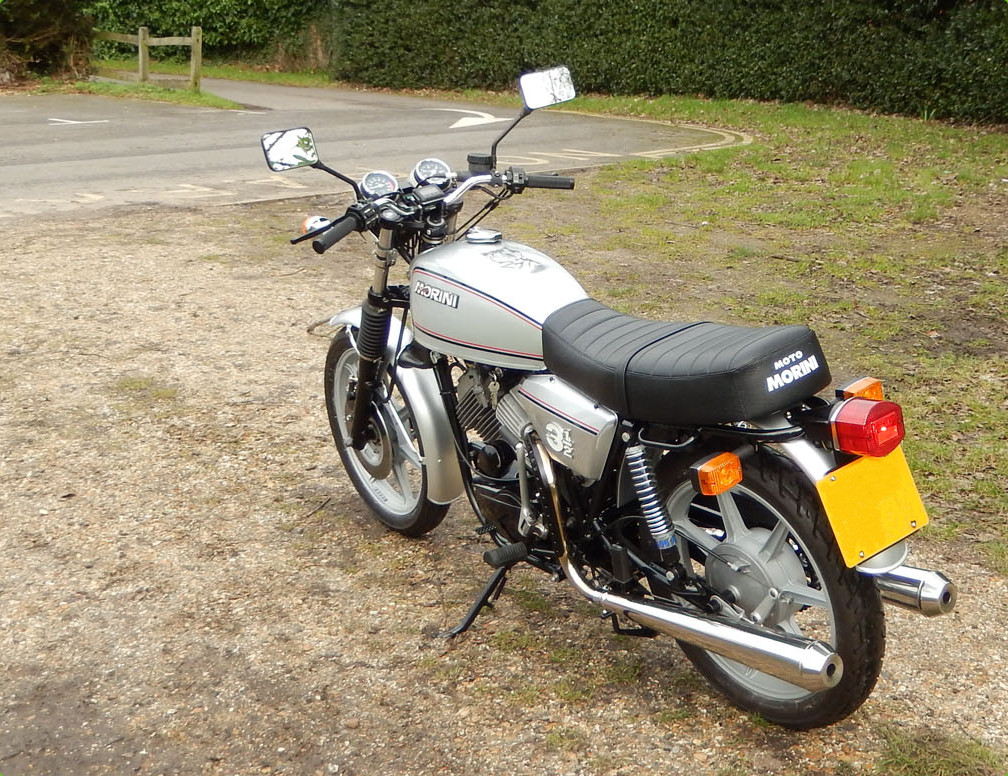
Other finishing touches include the re-chroming of the handlebars, headlight trim and mounting brackets by Silvabronz. The bodywork is finished in a bright Norton silver with red and black pinstripes.
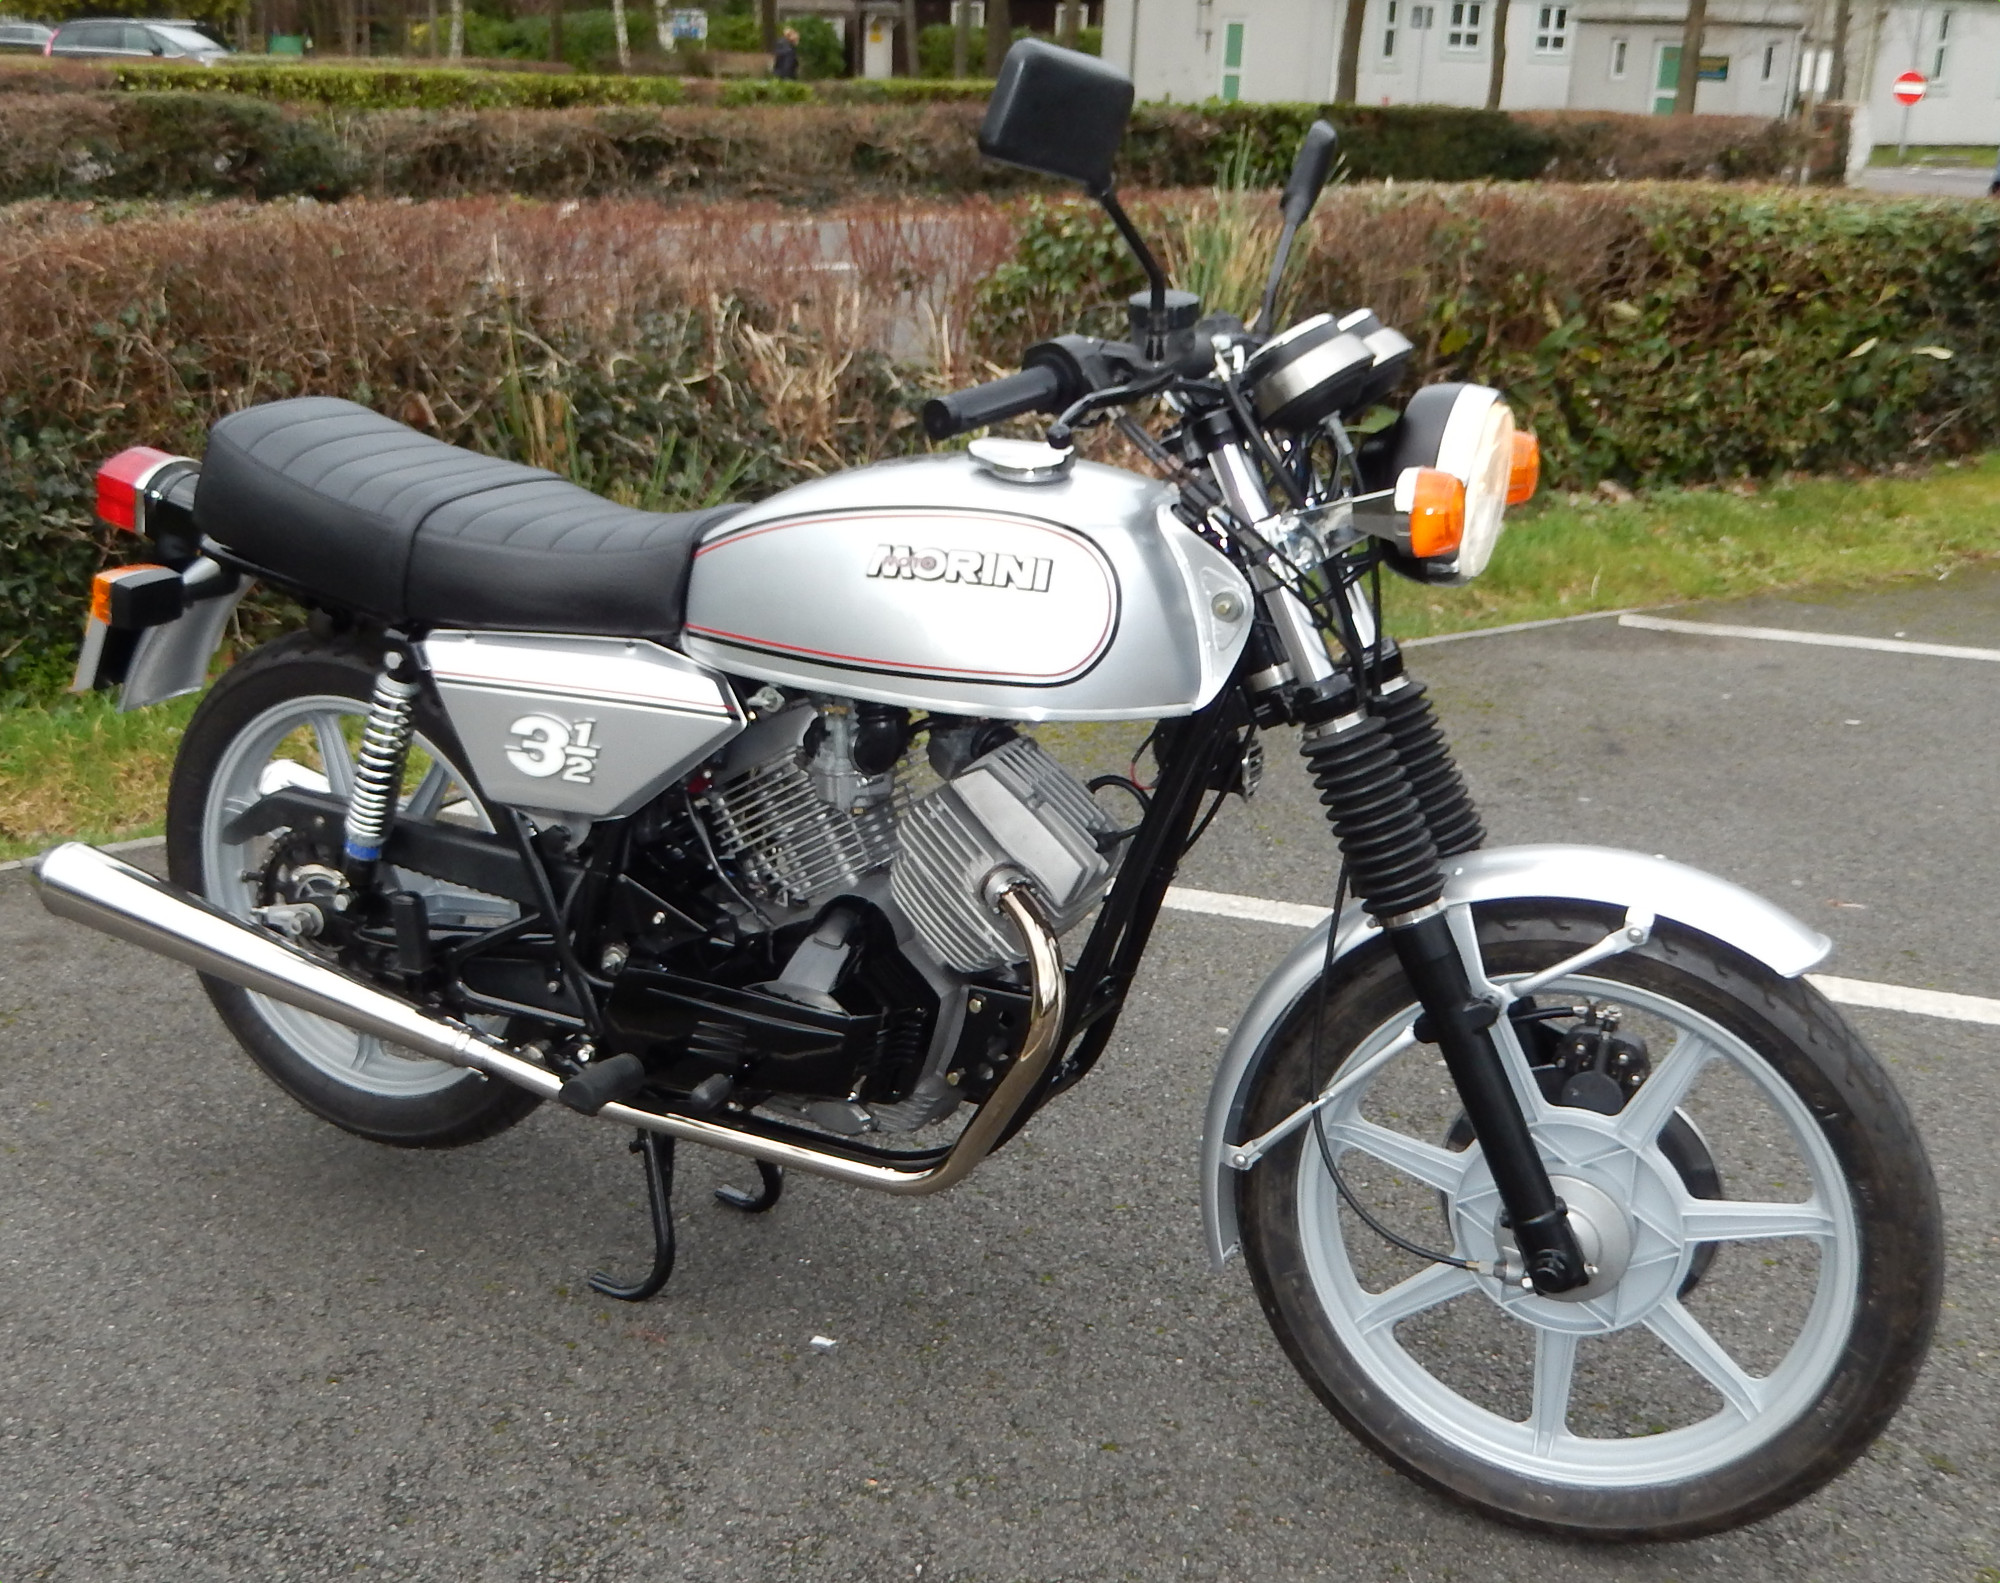
Bodywork finished in a Norton silver with red and black pinstripes
A tatty seat can let down an otherwise solid restoration so Adrian sent it off to RK Leighton who welded up the base where it had rotted, powder-coated it, added new foam and replaced the cover. Finally, they stencilled the Moto Morini logo across its tail-end.
A refurbished seat makes all the difference
In case you’re wondering, yes, that is a tiger on the tank! It’s there because the owner, Norma Hull, loves tigers and wanted one on the bike. The image was printed onto a film which was then lacquered onto the tank.
Electrics
The electrical systems of Italian motorcycles from this period are not especially noted for their reliability and this bike is no exception. Presumably in an attempt to weather-proof them, this bike’s electrics, including the handlebar controls, were coated in a light grease/petroleum jelly. To remove this, they were washed in engine degreaser and hot water, all contacts then being re-protected with ACF-50 once all the water was removed. To make working on them easier in the future, Adrian labelled each harness to show what it connects to and any crimp connectors were replaced with a better heat-shrink insulated type. Handlebar controls were stripped and the housings cleaned with IPA alcohol before restoring the white lettering.
Top-tips
- Taper-roller bearings are a must-do upgrade for most bikes from this period and Adrian wisely fitted a set to the Strada.
- Test all earth points with a multimeter against every other earth point. Pay particular attention to the front indicator mounting point on the headlight housing – this is an earth point and is known to cause issues with front indicators.
- The original fuse holders on these bikes are the round glass type and these are prone to failure from vibration. Replacing them with the blade type helps to improve the reliability of the system.
- Test fit all frame components (e.g. side stand, centre stand, etc.) before going for the final fit.
- An 8mm hex drive on the damper rod allows the damper rod bolt to be easily torqued to the correct 16 ft/lb (22 Nm).
- Clear all threads of powder-coating before building.
- Change the cambelt at 12,000 miles or 3 years (whichever is the sooner).
Special tools
A digital test indicator, similar to that used by Adrian to determine true TDC, is certainly a considered purchase with the example below having a RRP just over £100. During this build, Adrian also found having both a high and a low range torque wrench and a crimping tool suitable for both insulated and uninsulated connectors to be invaluable.
Miscellaneous suppliers
Pro-bolt: stainless steel bolts and aluminium finishing caps.
Simply Bearings: bearings and dust seals.
Roadwheel: removing/refitting and balancing wheels after rebuild.
Scheduled shows
Adrian plans to take this bike to the following shows (subject to the weather), so get yourselves along to:
Bike Life Classics Day at Sammy Millers Museum (New Milton, Hampshire) – 26 June 2016
Cassington Bike Night (Cassington, Oxfordshire) – 27 June 2016
What are you waiting for?
If you would like to see the fruits of your labours on this site, submit your details and we’ll be in touch.